Continuous deployment of Vue.js app to AWS using Bitbucket Pipelines
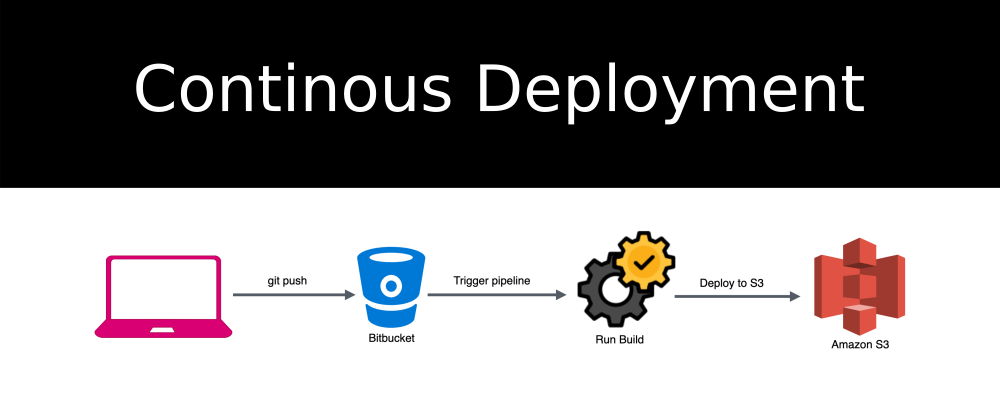
Hello guys, I recently created a Bitbucket Pipelines to deploy my Vue.js app on Amazon S3 and today in this article I would like to share the step-by-step process. Before starting I assume that you already have up and running vuejs app on bitbucket and also AWS account.
What are the steps?
- Create and configure Amazon S3 Bucket.
- Create IAM user in AWS console that can access the S3 bucket from Bitbucket.
- Configure Bitbucket to use Pipelines.
- Add bitbucket-pipelines.yml file in our project.
- Push code to Bitbucket, and check the live vue app.
Step 1: Create and configure Amazon S3 Bucket
Click here to sign in to your AWS Console. After signing in to your aws console click on Services present in the header, look for S3 service in storage section and click on it.

After redirecting to S3 page click on Create Bucket button. In the Name and region page type name for your bucket and choose the region where you want your bucket to reside then click on the next button. On the Configure options page no need to make any changes, keep it as it is and click on next button. Now in the Set permissions page we need to make some changes as in below image to make files available publicly.

You can see that amazon recommended to tick the options in Manage public access control lists (ACLs) section but that is only if you want to store private data on this bucket. So to create publicly accessible bucket we'll ignore that recommendation and deselect the two options as given in above image after that you can click on next button, Review the S3 bucket and click on Create Bucket.
It will take a few seconds to create a bucket after that you can see the bucket in the list of buckets. Click on your bucket name that you just created and you will see something as below.

Now as our Bucket is created we need to enable the static site hosting for this Bucket. And to do that you can go to Properties tab. Click on Static website hosting, and then choose Use this bucket to host a website. You will be prompted to give index document ( home or default page for website ) enter index.html and before clicking on save you can note down the Endpoint URL where your website will be live in step 5.

Now we have amazon S3 bucket ready with Static website hosting, So let's move on to the next step.
Step 2: Create IAM user in AWS console
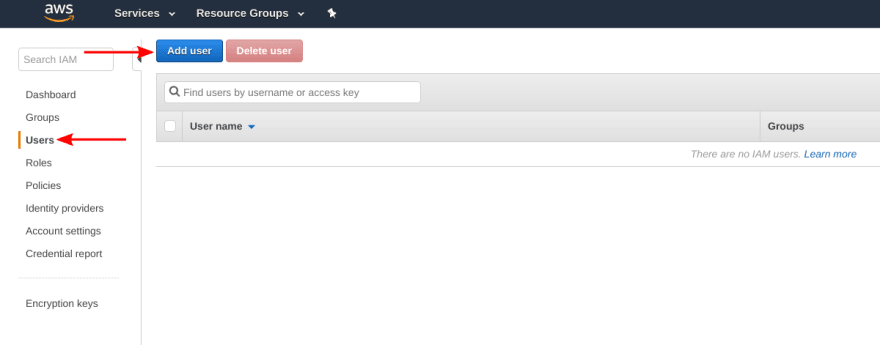
In this step we'll create the IAM user which will give us two keys 1. Access key ID and 2. Secret access key. This keys will be used by our bitbucket account to upload the repository code to amazon S3 bucket. To go on IAM service page navigate to Services > Security, Identity, & Compliance > IAM or you can follow the below image.

After moving to the IAM service page in the navigation pane, choose Users and then choose Add user.
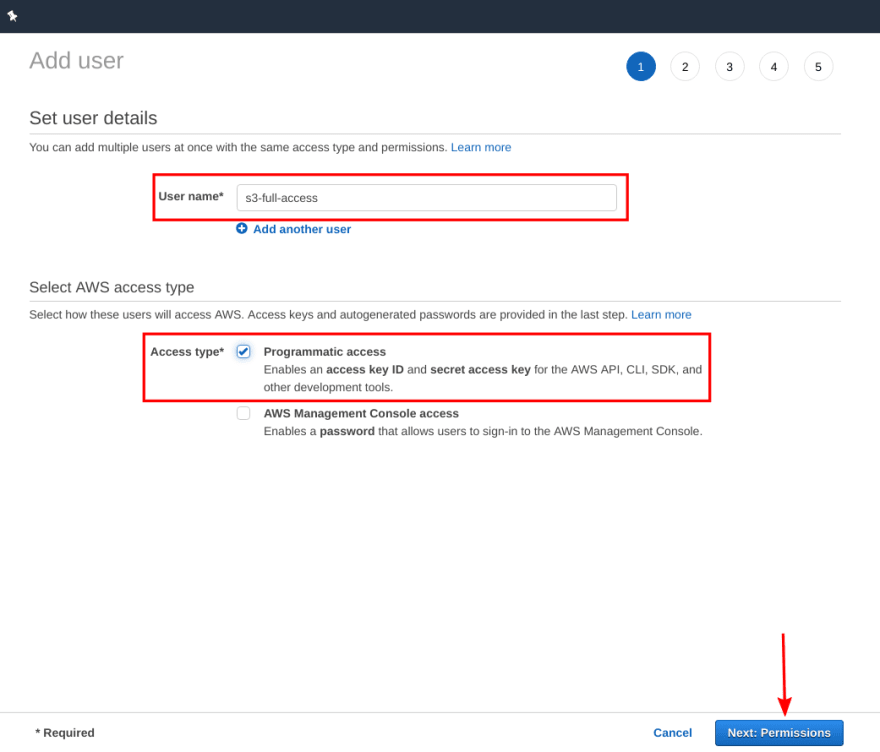
Type the user name for new user and choose Programmatic access in Access type then click on next: Permissions button down below. We are creating this user to access the S3 bucket from Bitbucket so I gave the user name as s3-full-access you can use any name you want.
On the Set permissions page there are three options, select Attach existing policies directly and you will see the list of available policies. In the search field type s3full and select the policy with name AmazonS3FullAccess then click on Next: Tags button.

On Add tags page you can add tags by entering the key-value pairs that will be added to user as metadata. But it is optional so you can go ahead and click on Next: Review button. Review your user details and click on Create user button. Now as mentioned before you will get two keys 1. Access key ID and 2. Secret access key for the created user. This keys are very important for our app deployment, Copy/Paste both the keys somewhere safe on your PC.

Don't try copying my secret keys from image, because it won't be valid at the time you will be reading this article 😬
Now as our user is created successfully we'll move to next step.
Step 3: Configure Bitbucket to use Pipelines
Log in to your Bitbucket account and move to your project repository then follow the below image to enable the pipelines for the repository.

After enabling Pipelines, In the repository Settings choose Repository variables from navigation panel. In the Name field write AWS_ACCESS_KEY_ID and in the value paste the value of Access key ID that you copied in last step and click on Add button, again follow the same for secret access key by giving name as AWS_SECRET_ACCESS_KEY. After that you should see something like below image.

This added Repository variables will be used in bitbucket-pipelines.yml file in the next step.
Step 4: Add bitbucket-pipelines.yml file to project
Go to your projects root directory and create a new file with name bitbucket-pipelines.yml. After that copy paste the below code to the bitbucket-pipelines.yml file.
										image: node:10.15.1


										pipelines:

										branches:

										master:

										- step:

										name: Build

										script:

										- npm install

										- npm run build

										artifacts:

										- dist/**

										- step:

										name: Deploy

										deployment: production

										script:

										- pipe: atlassian/aws-s3-deploy:0.2.4

										variables:

										AWS_ACCESS_KEY_ID: $AWS_ACCESS_KEY_ID

										AWS_SECRET_ACCESS_KEY: $AWS_SECRET_ACCESS_KEY

										AWS_DEFAULT_REGION: "YOUR_AWS_DEFAULT_REGION"

										S3_BUCKET: "YOUR_BUCKET_NAME"

										ACL: "public-read"

										LOCAL_PATH: "dist"
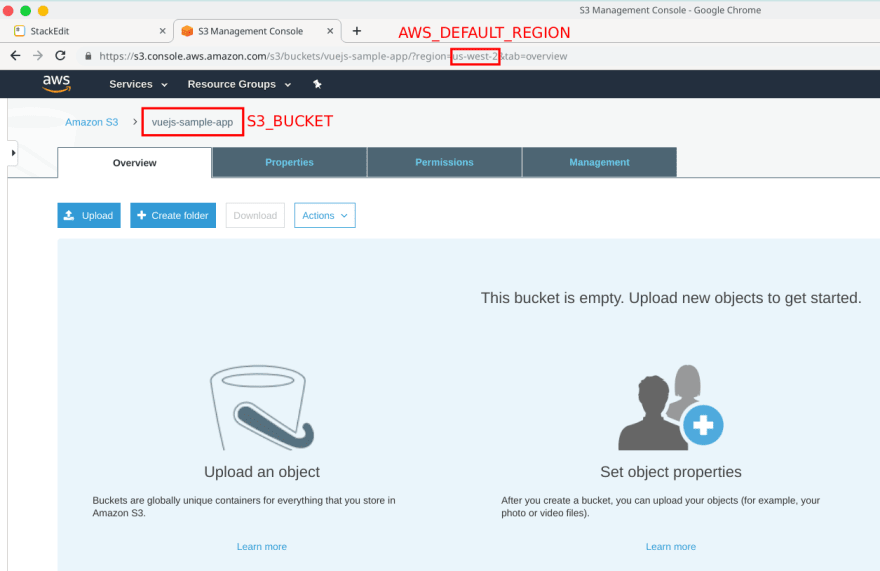
Now you need to make some edit in above file to make it work and for that you need to update the value for AWS_DEFAULT_REGION and S3_BUCKET, these values can be found in your S3 bucket page. In below image I have marked where you can find those values, copy/paste these values into the above file. Log in to your aws account and moved to S3 bucket that you created in step 1.
Step 5: Push code to Bitbucket, and check the live running app
Finally we're in the last step. Commit your bitbucket-pipelines.yml file and push it to the master branch. After pushing your code to master branch move to Pipelines page and look for your pipeline status it will be In progress after it changes to Successful you can go and check your live vuejs app up and running on aws S3.

If you don't know the site URL you can check the step 1 where I have mentioned where you can find the URL Endpoint for your S3 bucket.
Conclusion
In this article we created S3 bucket and IAM user on AWS and successfully setup bitbucket pipelines for continuous deployment of vuejs app to Amazon S3.